Felhasználói Kézikönyv
Manuális feltöltés
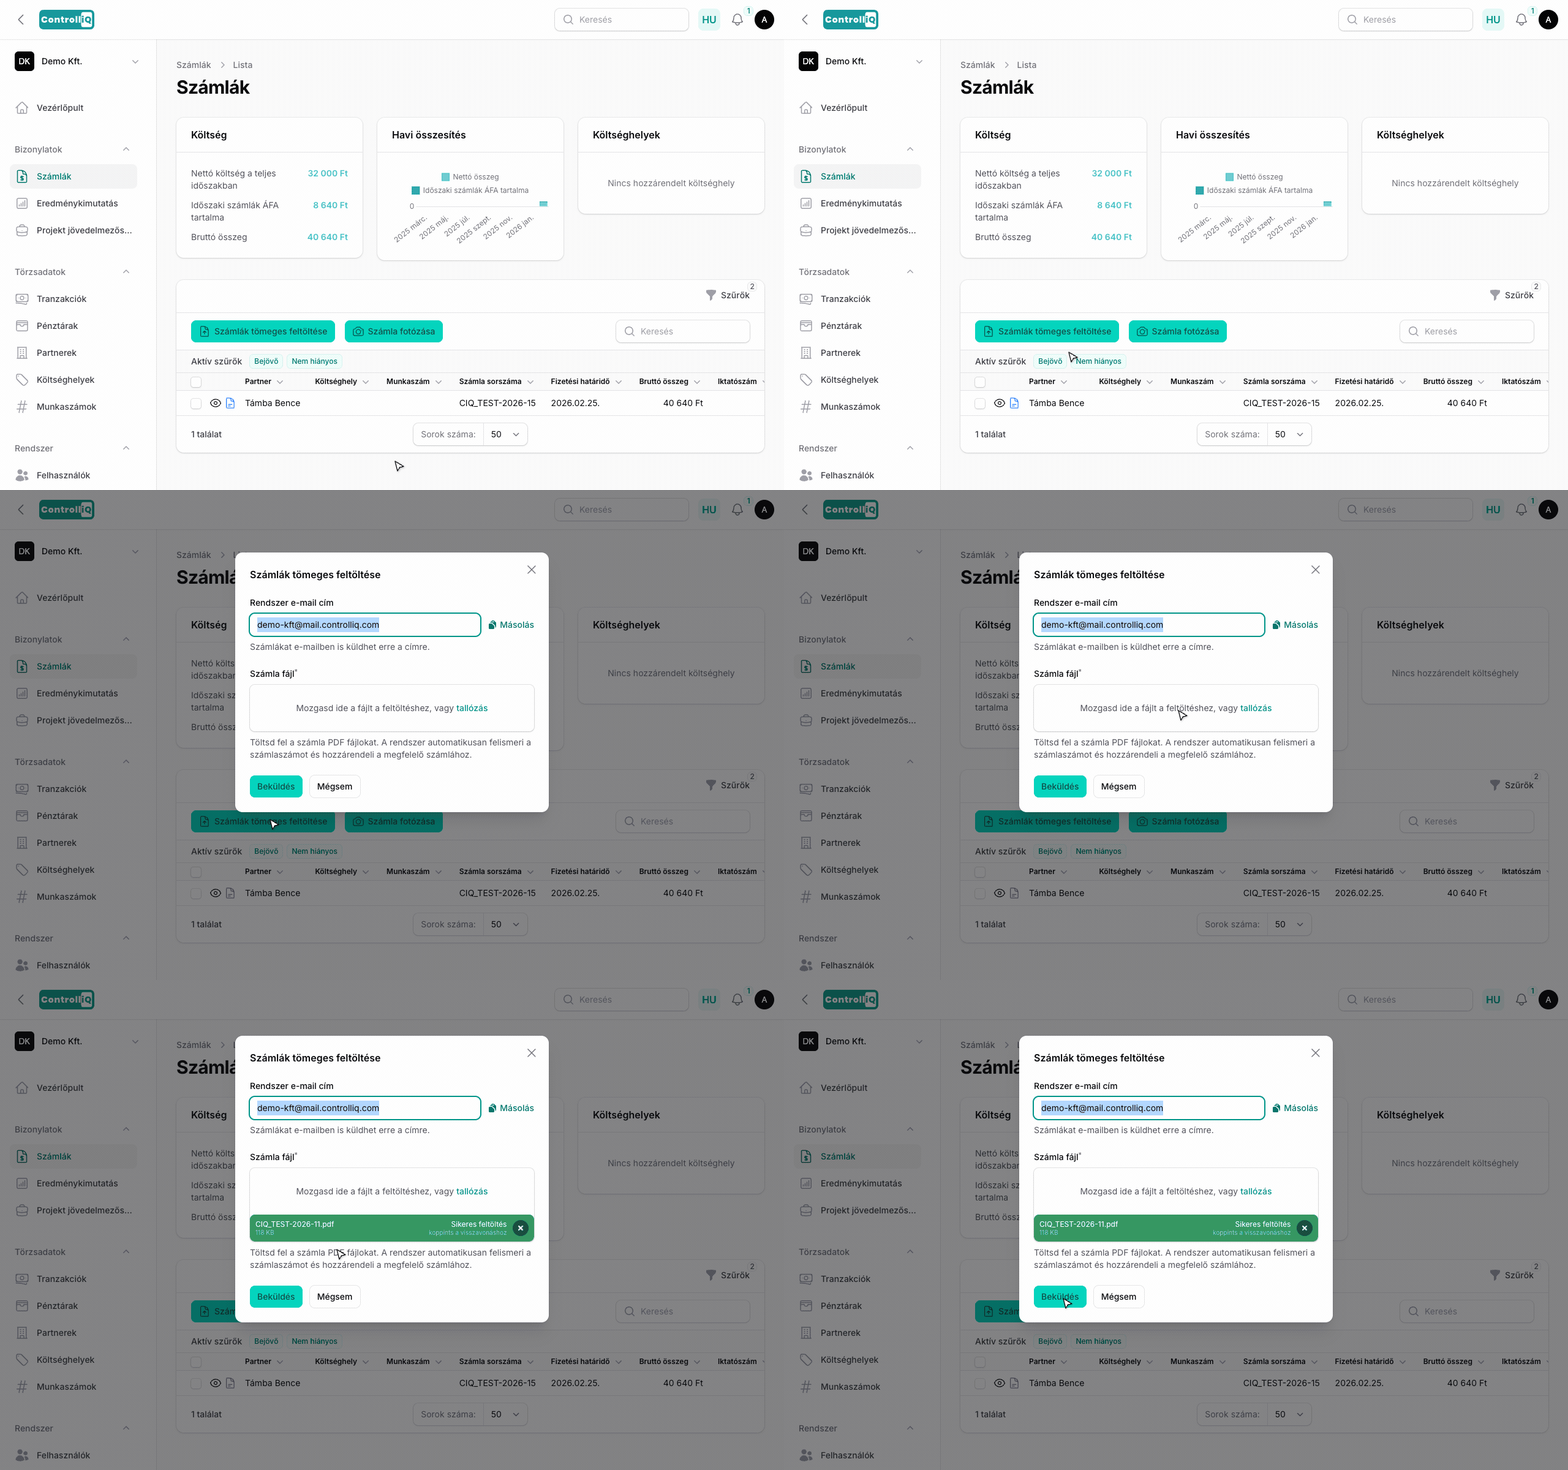
Számla manuális feltöltése
A NAV és Billingo szinkronon kívül lehetőséged van számlák kézi feltöltésére is.
Feltöltés lépései
Mi történik feltöltés után?
A beküldött számlát az AI automatikusan feldolgozza: kinyeri az összes releváns adatot (számlaszám, dátumok, összegek, ÁFA, partner, tételsorok), majd megkeresi, hogy a rendszerben létezik-e már hozzá kapcsolódó, más forrásból (például NAV-ból) származó számla rekord. Ha talál egyezést, párosítja a feltöltött PDF-et a meglévő rekorddal. Ha nem, létrehozza a számla rekordot a leolvasott adatokkal.
Támogatott formátumok
A ControlliQ PDF formátumú számlákat fogad el. A legjobb eredmény érdekében érdemes jó minőségű, olvasható PDF-eket feltölteni.
Számla fotózása
A PDF feltöltés mellett lehetőséged van közvetlenül a telefonod kamerájával is számlákat rögzíteni. Ez különösen hasznos papíralapú számlák (pl. blokkok, nyugták) esetén.
A fotóból a rendszer ugyanúgy AI feldolgozással kinyeri az adatokat, mint a PDF-ből.
Kreditfelhasználás
A számlafeldolgozás 1 AI kreditet használ fel számlánként.